Quilted Fabric Carrots

I have been totally wanting to make some more Eastery decor items.
Since quilting is my main love I decided to quilt some carrots!
Supplies for 1 carrot:
Batting scrap atleast 20" X 8.5"
Orange fabric atleast 20" X 8.5"
Green fabric atleast 6" X 12"
coordinating thread
Creative Grid 60 Triangle Ruler
polyfil
sewing needle
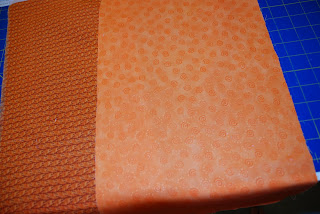
Here are samples of oranges I used.
layer the batting and the orange fabric together and quilt a random pattern of "almost" straight lines.
take your Creative Grid Ruler and line it up with the---- side of the quilted fabric and cut out a triangle.
I found there are 2 ways to attach the carrot tops.
The first option I folded the right sides of the triangle together as shown.
pin the edge and sew.
then turn right side out and flatten.
using a
square ruler....trim off the excess 'ear'
stuff the carrot with polyfil.
Using a double stranded thread gather the open edge of the carrot and pull opening closed.
Finish with a double knot.
I made several carrots.
I was able to gather this nearly closed,
the leafy fringe will cover this up.
In addition, I made 4 types of green leaves.
First I used Make Life fabric 6" X 12" and batting.
Layered them and stitched lines as shown across the bottom.
Trim about 1/4 inch from the sewn lines.
Then cut down in between the lines to form the leaves.
Roll up the leaves and sewn to the top of the carrot.
Second style is homespun.
Take a piece of homespun about 4" X 8".
Pin and sew to the top of the carrot before gathering.
gather the orange carrot fabric/green leaves
then sew across the opening
should look like this.
I took an extra strip to cover the opening of the top.
I cut the fabric from the raw edge toward the sewn edge of the homespun. This created 'leaves'.
Third option is again to sew the 'leave' fabric before you sew the carrot closed as shown.
I took a green 6" X 12" and folded it in half. Sew across the top with raw edge to the bottom.
Then sew carrot, turn right side out.
The raw leave edge is now 'up'.
Gather inner fabric and hand sew closed.
Next gather the carrot an leaves with sewing thread.
This is how I 'closed' the top of this carrot style.
Carrot will look like this.
Trim from the raw edge of the leaves to the sewn edge to create the 'leaves'.
This shows the leaves in batik fabric.
I would say I like the look of the homespun the best, but the batik was easier to sew and gather.
The result is a basket of fabric carrots, super fun Eastery decor.
I was really pleased that I was able to use only my stash for this project.
I hope you are inspired to create some carrots for your Easter decor.


14 comments:
Vickie, these are just way too cute!! Great tutorial and you really can keep them out in your kitchen all year. After all they are a vegetable. You just will need to make some more veggies to go along with them.
Great idea and I have sooo much orange left from the log cabin ING NYC marathon quilt I made for my son. (ING colors are orange and blue) Thanks!
Very cute! Those would make for a fun pin cushion too!
Very sweet. I love the idea!
These are just great! Where did you find such great orange fabric? I know you love orange and probably have a large stash of it!!! I agree with Punkie Pie, this would make a great pincushion!
Too cute!!
Well done...thanks for the tutorial!
Paulette
Thank you for this! Vickie it rocks!
TOOOOOOOOO cute!
OMG! I am going to make 3 for my kitties and totally stuff them with catnip. HAPPY EASTER for the cats!
How cleaver you are! The carrots are adorable.
Thanks for the tutorial! These are so creative! Almost good enough to eat.
I love these!!! Thanks for the tutorial....
Adorable carrots! I love how you made the tops. Thanks so much for sharing all your details. Makes me wanna shop for some orange & green fabric asap! ;o)
I just LOVE this tut. I needed a carrot for my snowman kit and this is perfect!! Thank you!
Post a Comment